Q2Qtorial - Getting Started
What is this for?
This tutorial provides a basic description and outline of how to create and run a Project in Q2Q. For more in-depth information, please refer to the User Manual. You may also contact us at support@goq2q.net with any questions you may have.
Basic Terms
These are the terms that form the backbone of Q2Q.
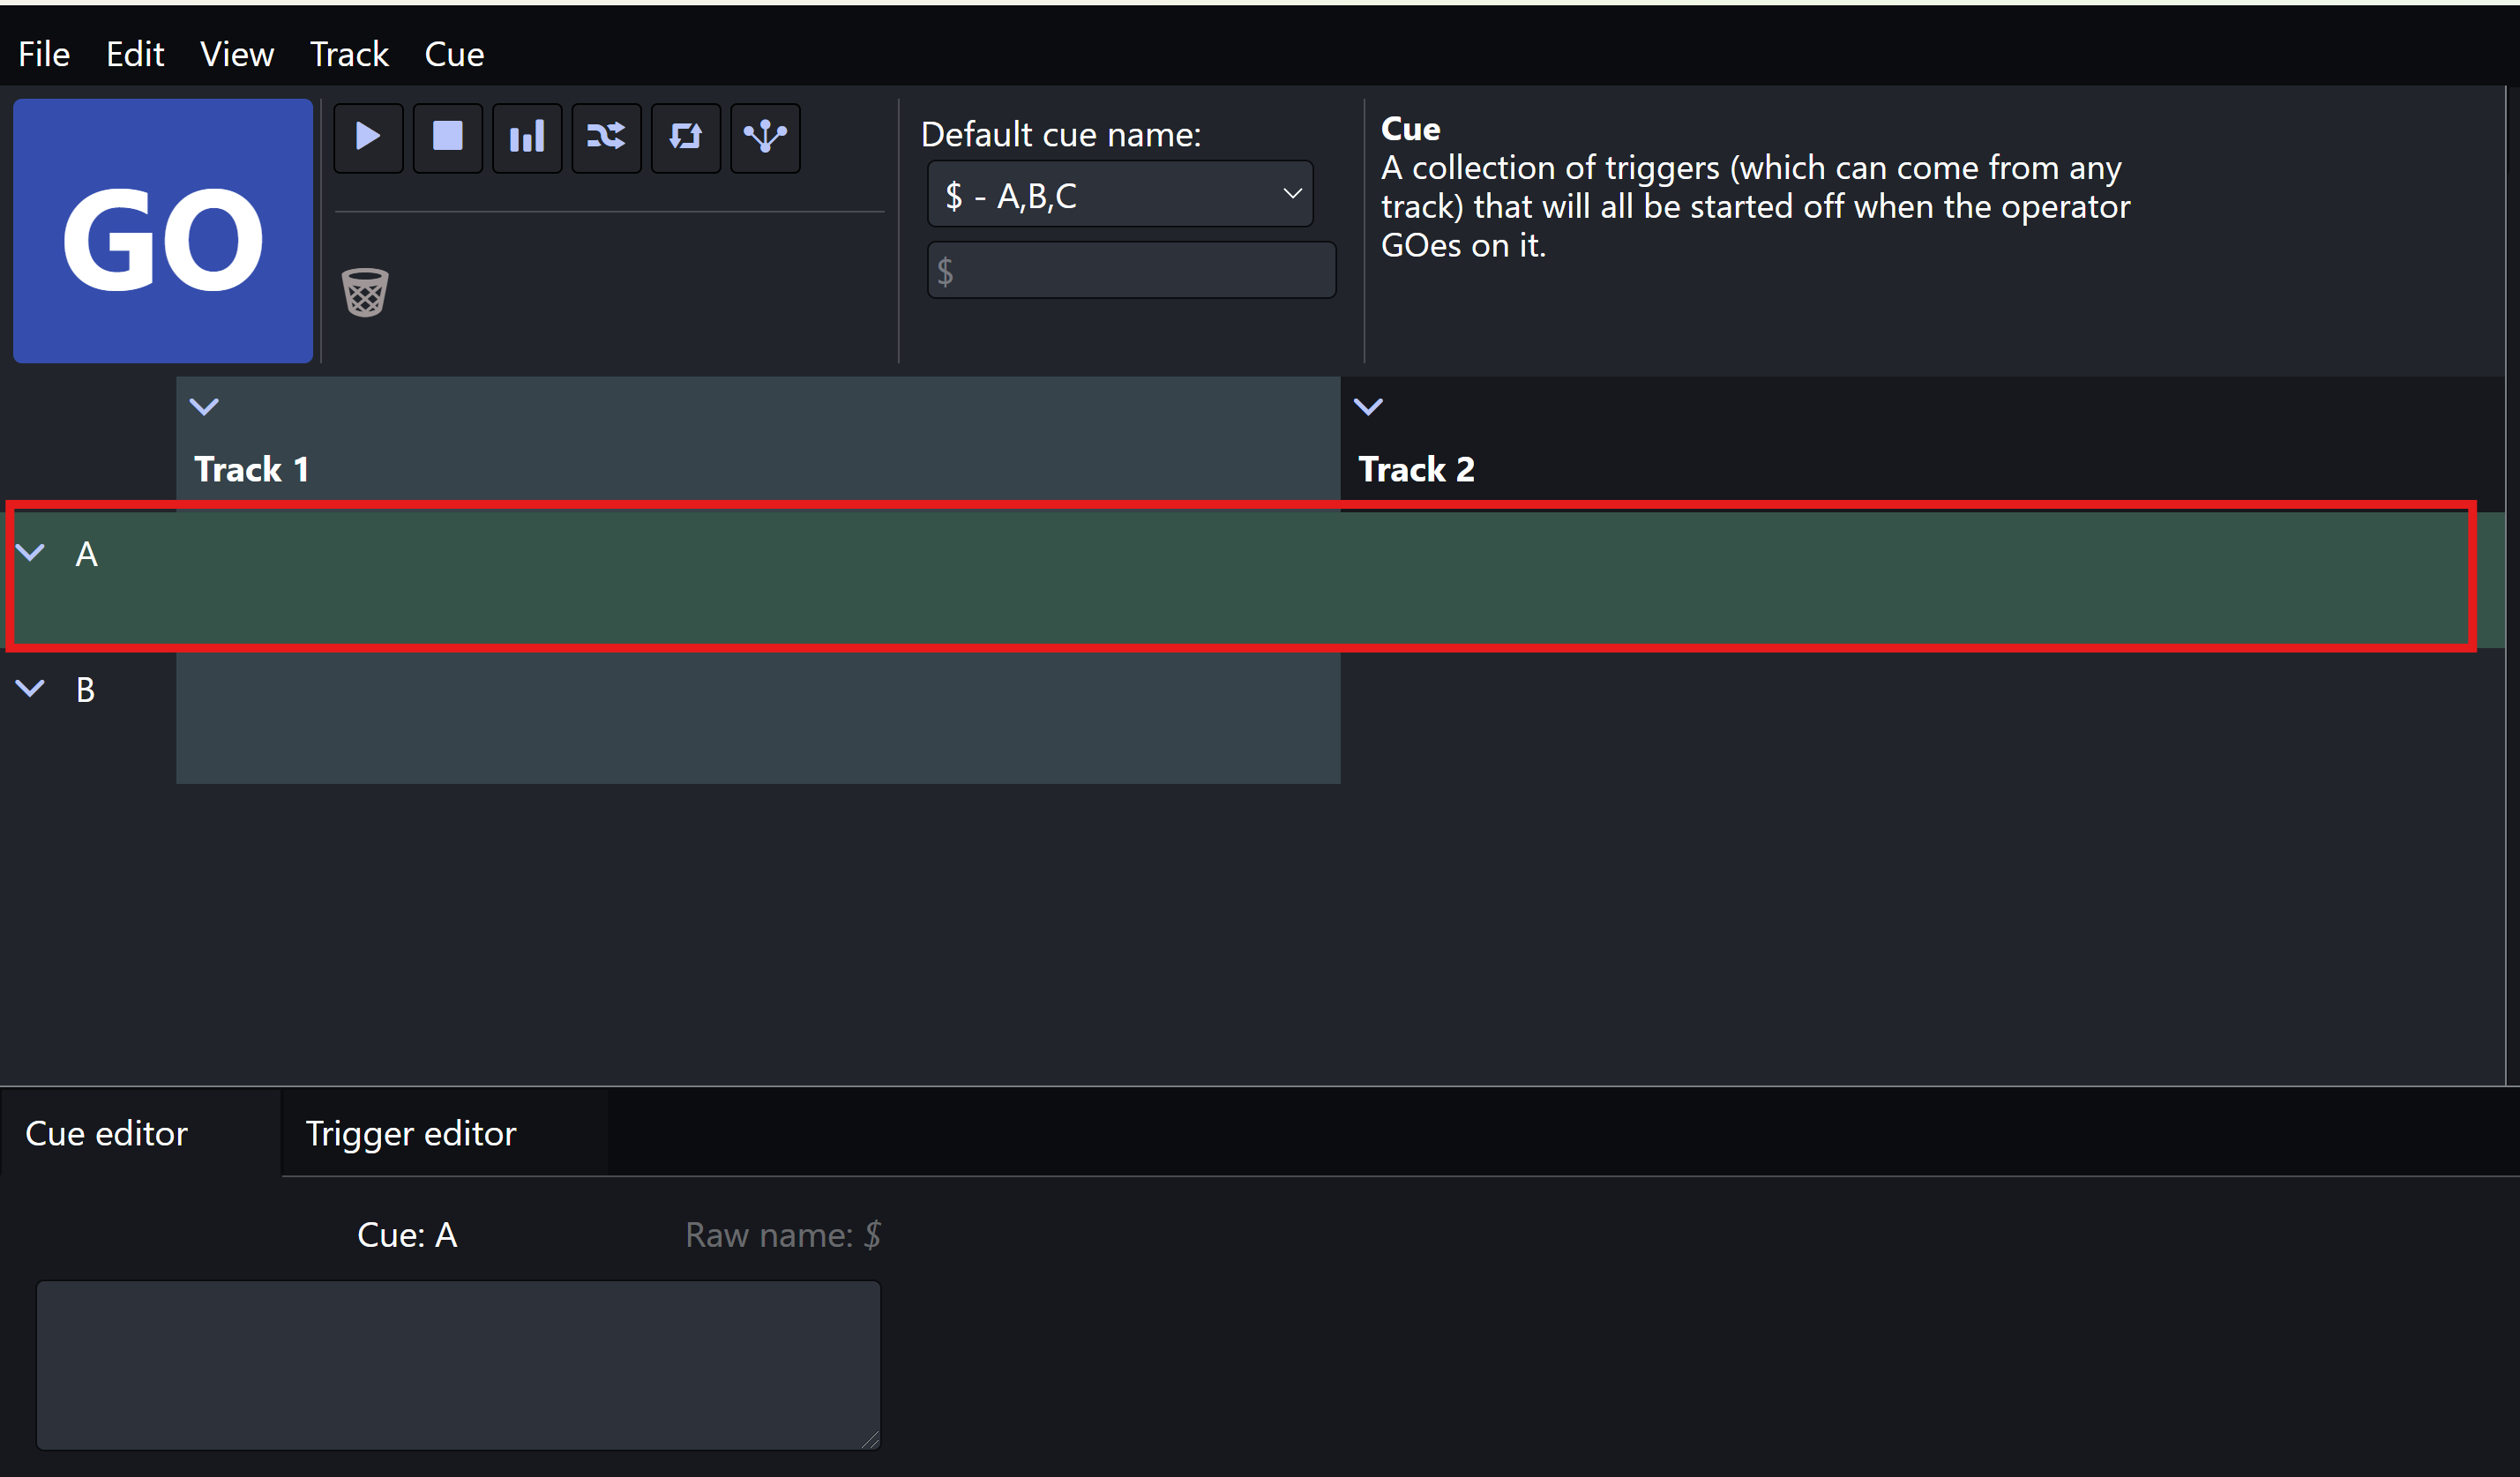
Cue
A Cue is a programmed sequence of sounds that can be fired at will, often in reaction to or anticipation of something happening on stage. Cues can be made up of one or many tracks and triggers. Cues are laid out in rows.
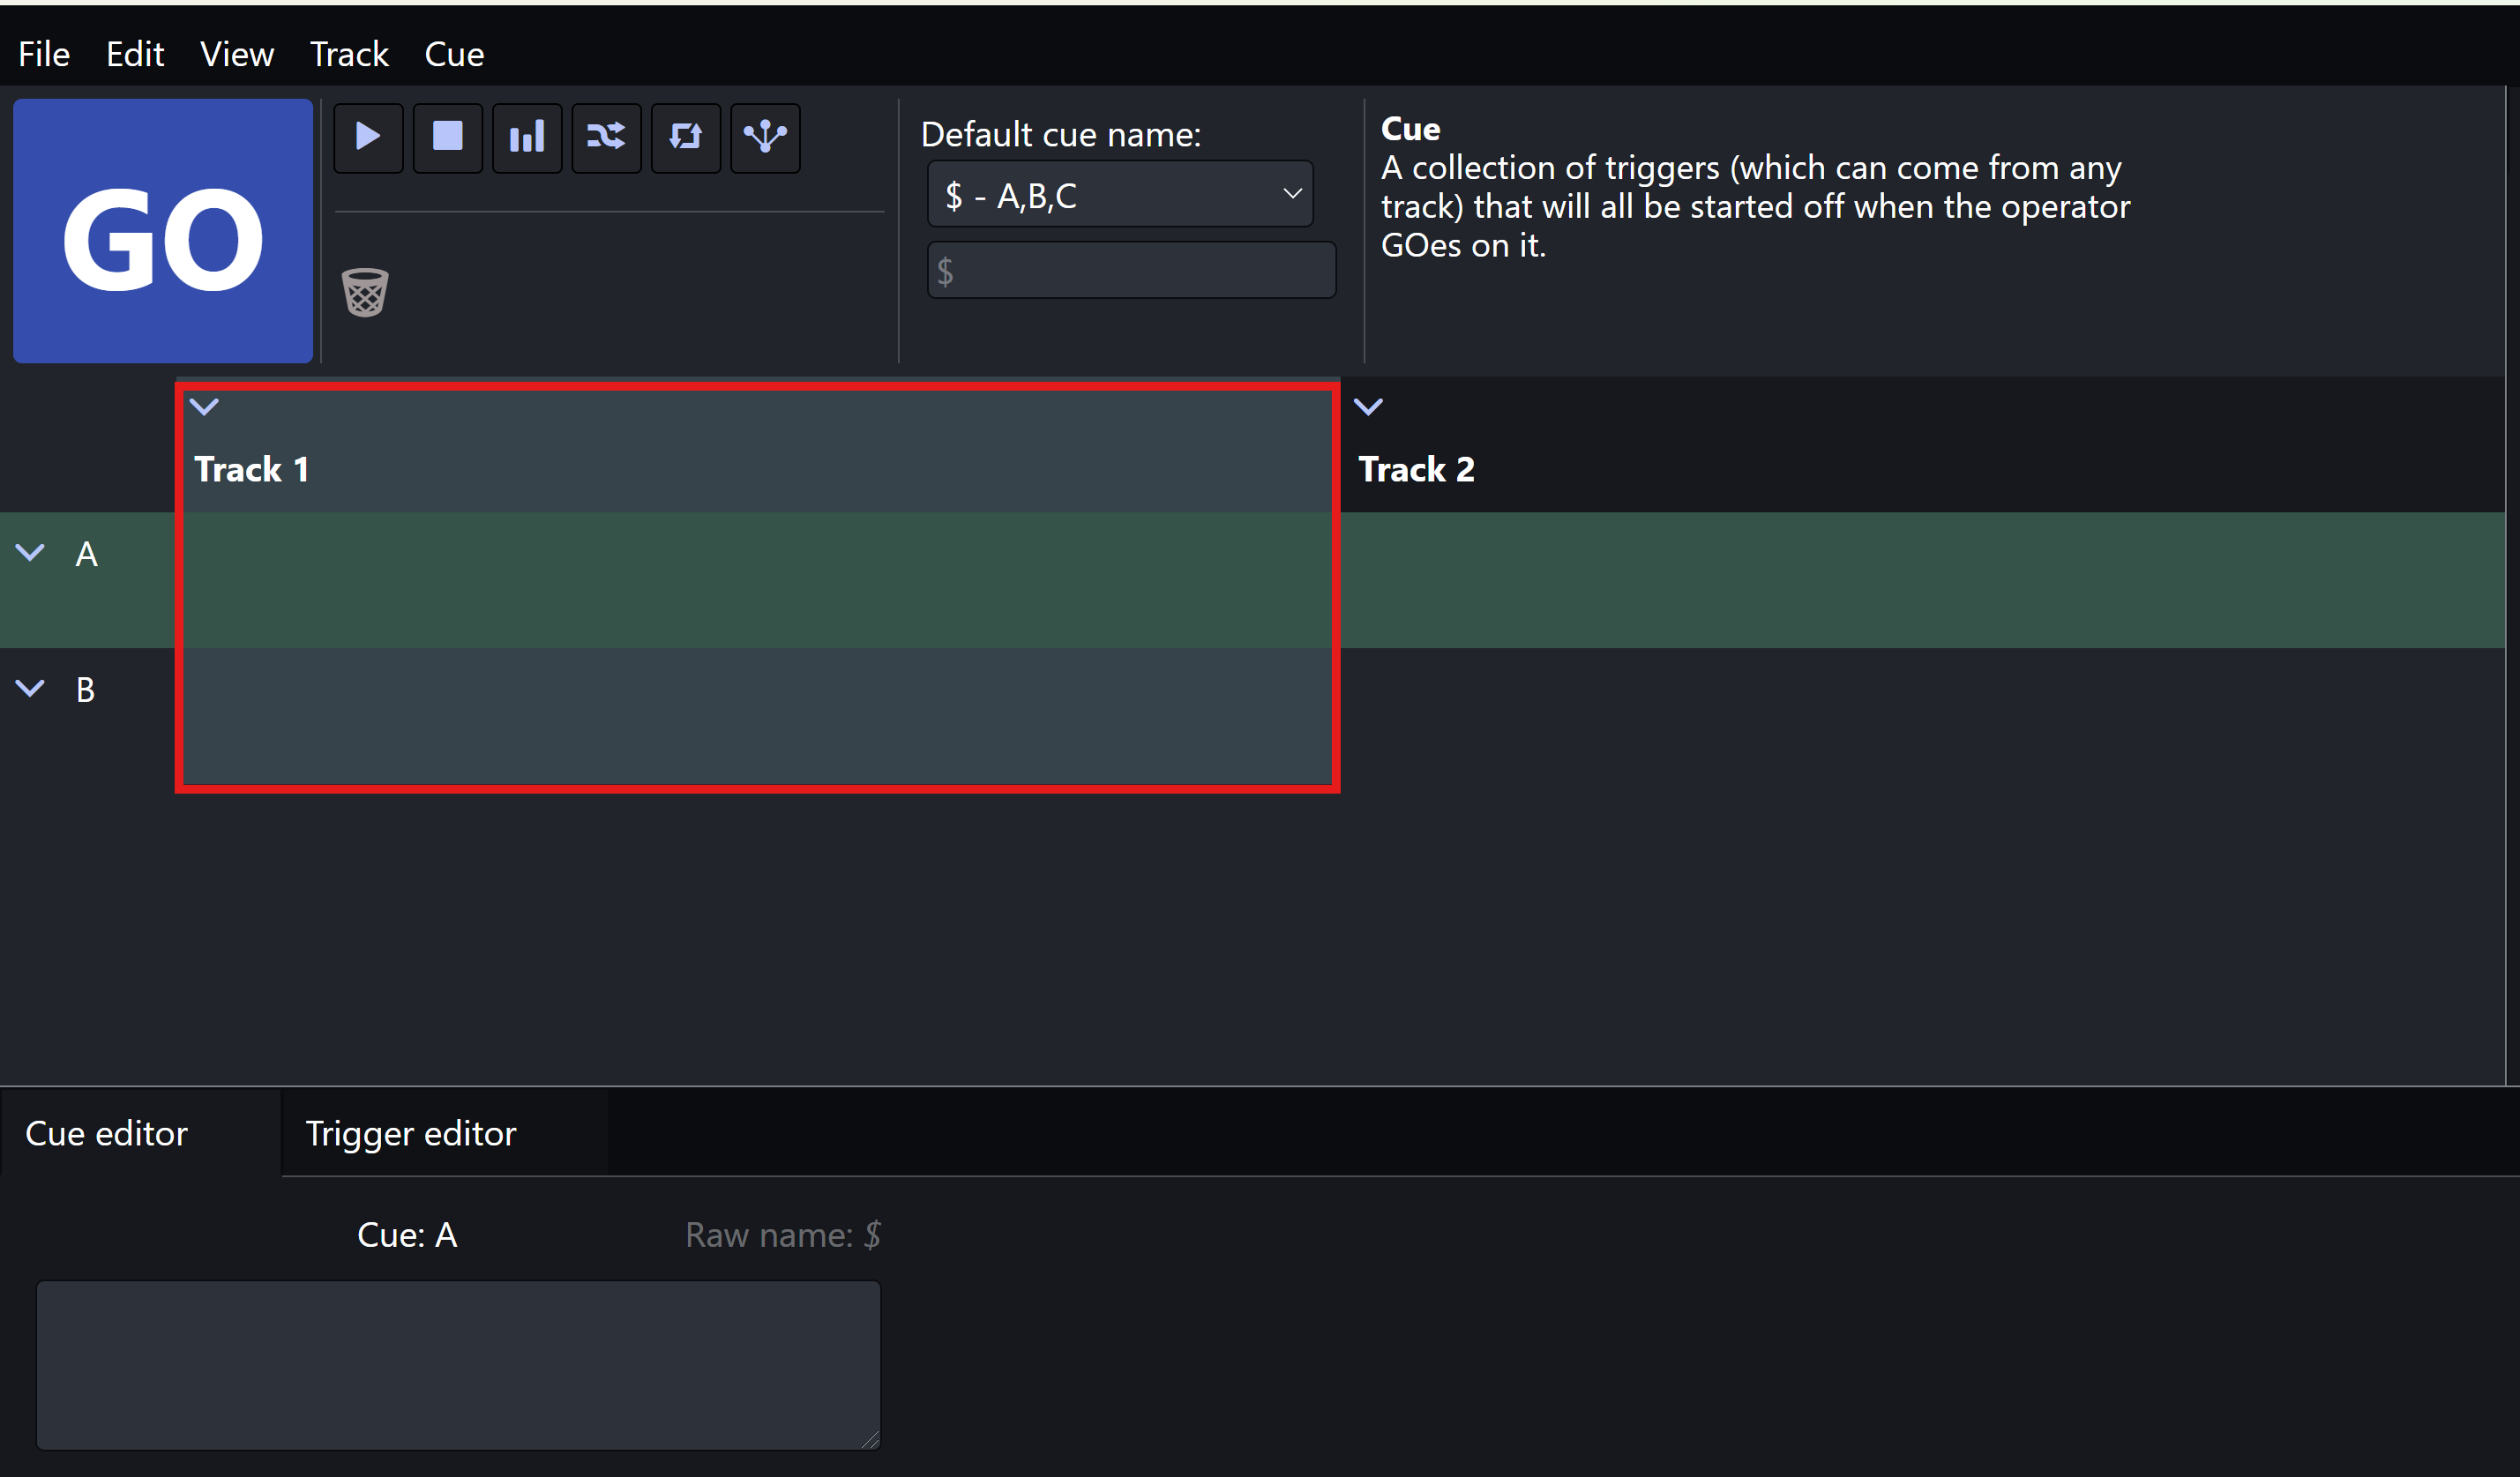
Track
A Track groups certain types of sounds together, allowing layered designs. Examples of typical tracks include Music, Sound Effects, and Voice Over. Tracks are laid out in columns.
Trigger
A Trigger is a single, distinct design element. A Cue can include one or many Triggers. These are the smallest units of action in Q2Q. Some examples include: starting sounds (like an individual gunshot sound effect), what you want a sound to do (like a fadeout on a thunderstorm), or sending OSC messages (like controlling an animatronic robot arm), etc.

Project
The “show file,” or the individual file containing all Cues, Tracks, and Triggers for a particular production.
Getting Started
Creating a New Project
- Open Q2Q. You will be greeted with this window.

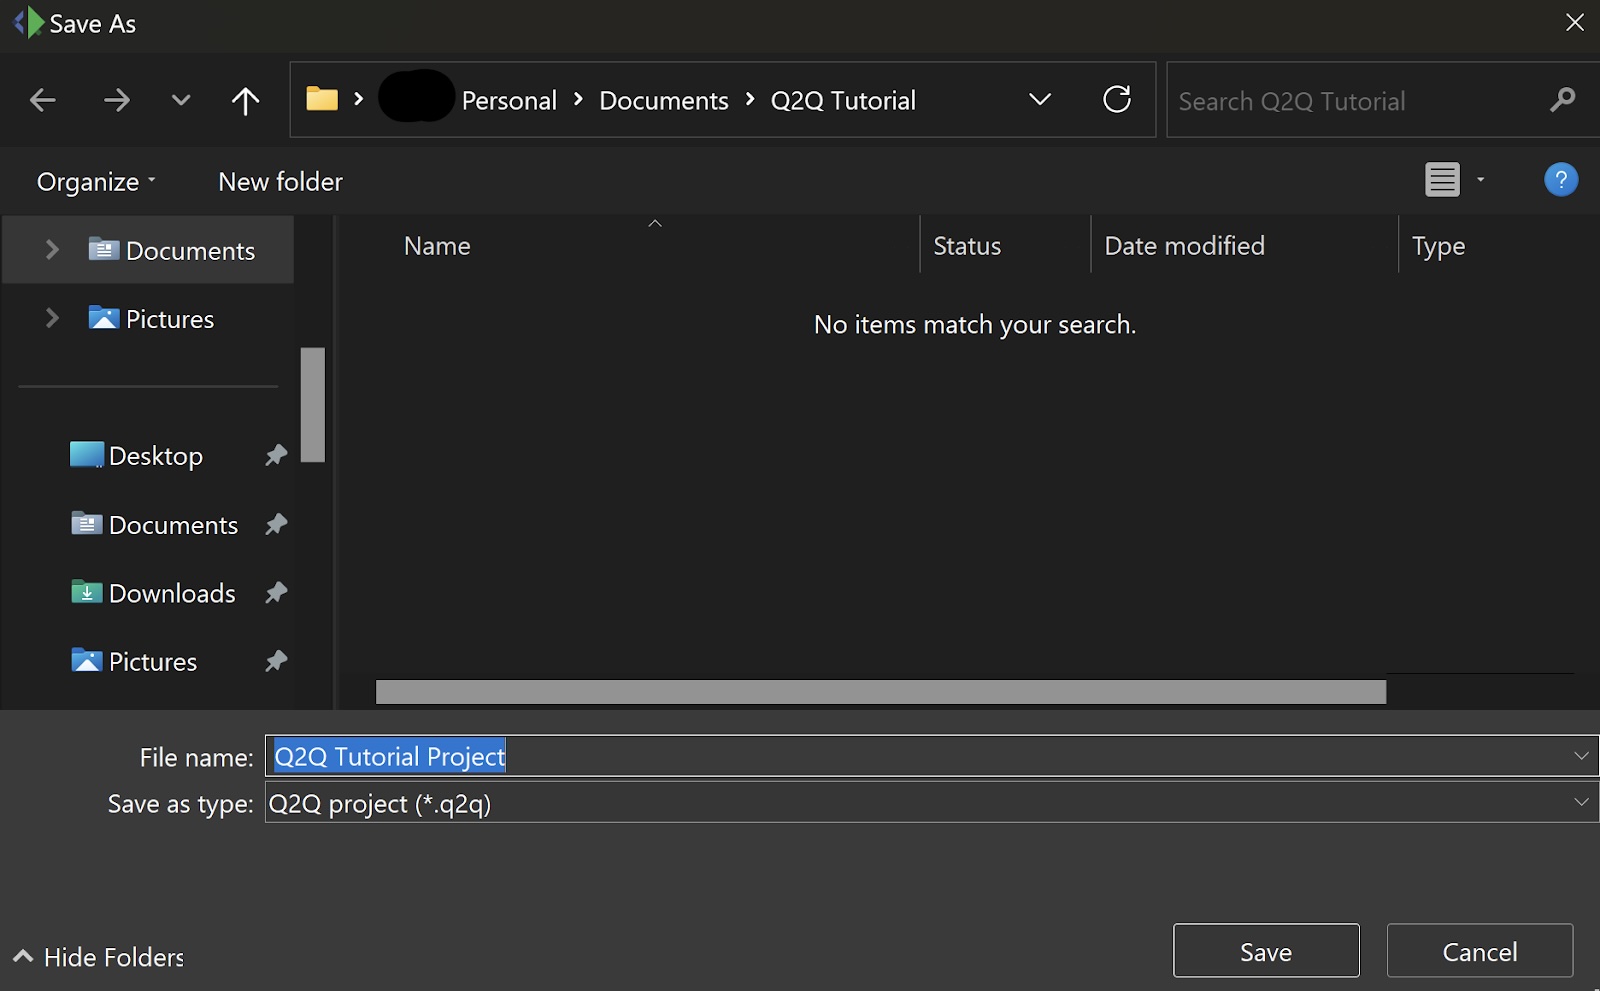
- Click on New Project…. Your File Explorer (Windows) or Finder (macOS) will
open. If this is your first project in Q2Q, create a New Folder to organize
your projects. Then, in the File Name bar, name your project, and click
Save.
- After saving, the Project will open and you can begin designing!
Opening Existing Projects
- Open Q2Q and click Open Project.
- File Explorer/Finder will open to the folder containing your Projects. Open your desired project and happy cueing! (Remember to save the Project and save it often while working!)
Building a Project
Before you begin building your project, we recommend having as many necessary audio files saved in the same folder your Project is saved in, or a child folder within it. Any Start Triggers added to a Cue will open your File Explorer / Finder to search for audio files, so having them preselected and organized will save time in the creative process!
Naming Cues and Tracks
Q2Q will open with one Cue and one Track already created. You can rename Cues and Tracks at any time by double clicking the name and typing your preferred name and pressing Enter.
Adding Sound
Drag and drop the Start Trigger icon from your Toolbar to the desired Cue and Track. Drop the Trigger in the widest white bar that appears (see below). Your File Explorer / Finder will open for you to select the desired audio file.
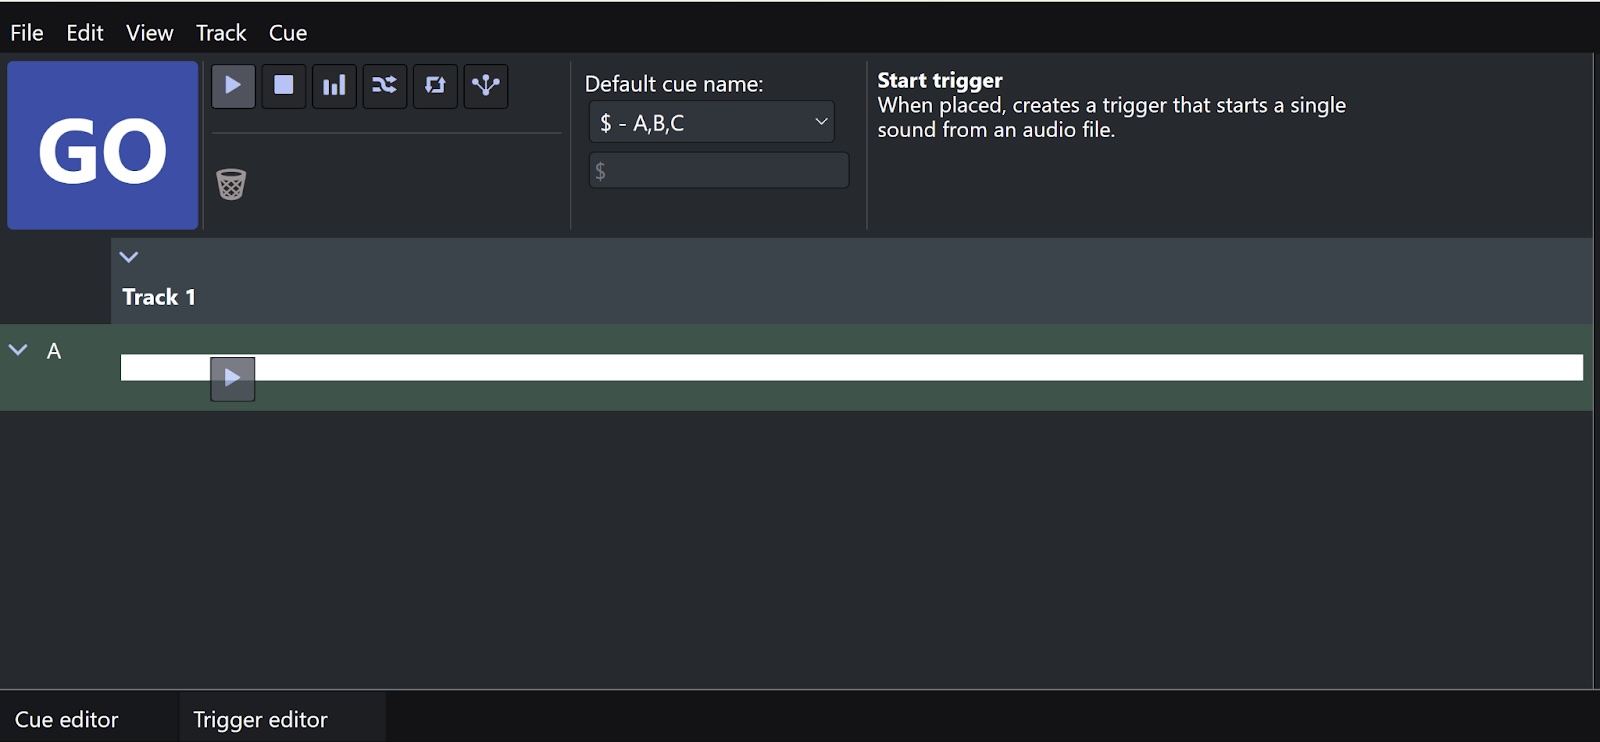
Once selected, the audio file is now a trigger ready to be fired.
Editing Triggers
If a Trigger is put in the wrong place, simply drag and drop the existing Trigger to the desired Cue. Deleting Triggers
If you no longer want a specific Trigger, drag and drop it to the Trash Bin Icon in the toolbar.
Undo/Redo
Currently, you will find the undo and redo buttons in the menu bar are grayed out. This is temporary, and those features will be made available soon! We appreciate your patience as we continue to make Q2Q the best in the business!
Adding Cues
To add more Cues, in the application menu bar, click on Cue>Insert Cue Before/Insert Cue After (shortcut Alt+Shift+C / Alt+C).
Adding Tracks
To add more Tracks, in the application menu bar, click on Cue>Insert Track Before / Insert Track After (shortcut Alt+Shift+T / Alt+T).
Adding Other Triggers
Stop Trigger
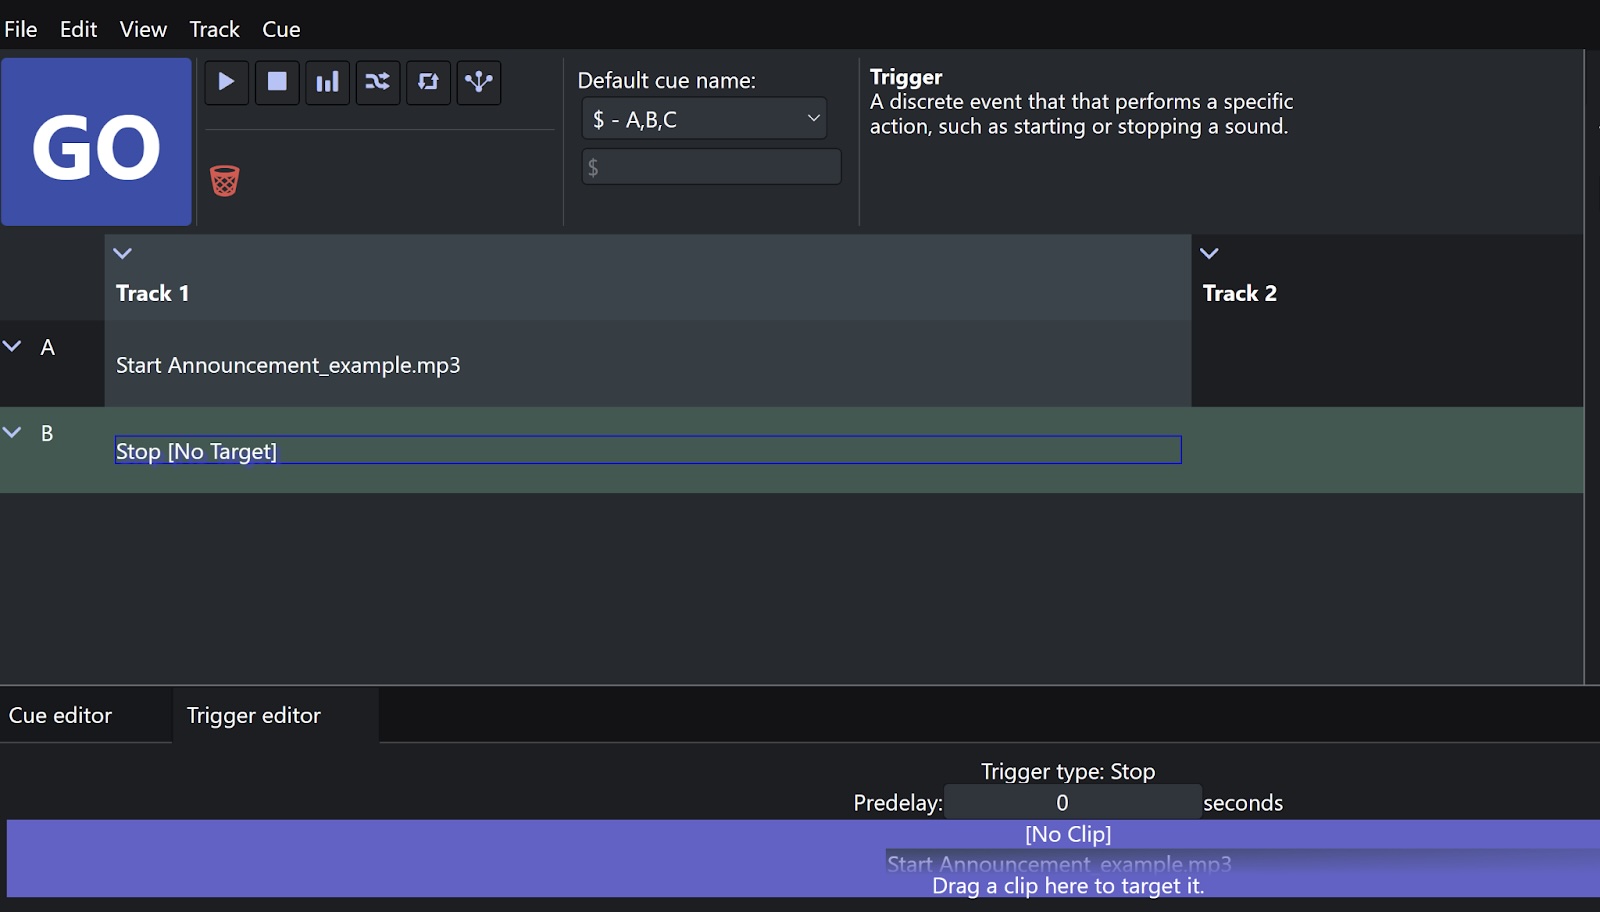
Drag and drop this Trigger to a Cue to end a Start Trigger. Once placed, drag and drop the target Start Trigger you want to Stop to the highlighted section in the Trigger Editor (see below).
Fade/Pan Trigger
Drag and drop this Trigger to a Cue to change the volume levels of a Trigger. Once a target Trigger is selected, adjust the volume levels and length of the Fade in the Trigger editor.
Crossfade Trigger
Drag and drop this Trigger to a Cue to completely fade out one trigger and fade in a new one. Once placed, drag the target Start Triggers to the appropriate places in the Trigger Editor.
Devamp Trigger
Drag and drop this Trigger to a Cue to end a sound loop and continue playing a Trigger.
OSC Trigger
Drag and drop this Trigger to a Cue to send an Open Sound Control (OSC) message to another program or device over the network.
Playing the Cues
GO Button
To play the Cue list, click on the Cue you wish to start (arm the cue), then click the GO Button (shortcut Spacebar) to fire the cue.
You may arm different cues using the arrow keys. Selecting a different Track will not change what is played. Everything in the armed Cue will start when fired.
After the Cue is played, the next Cue will automatically arm. Click GO whenever you wish to fire your next Cue.
Stopping All Cues (Panic)
If you ever need to stop all Cues at any time (Panic), press the Escape Button on your keyboard.